• Welcome to the BMW R18 Forums. Member registration disables ads and allows you to post and share. Register Here.

RSD Engine Cover

  • <i class="fa--xf fal fa-check "><svg xmlns="http://www.w3.org/2000/svg" role="img" aria-hidden="true" ><use href="/data/local/icons/light.svg?v=1789222567#check"></use></svg></i> Discussion starter Discussion starter Ulrich
  • Start date Start date

Ulrich

Well-known member
Joined
Aug 18, 2022
Messages
1,806
Location
Southern Oregon
Visit site
Bike
BMW R18 FE / '66 Pan-Shovel
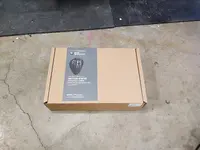
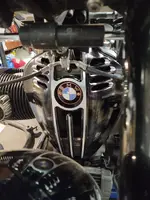
Well look what came in the mail from MAX BMW 😃

Chest Plate 01.webp

... and it came really fast considering they are on the other end of the country ... at this time a big shout out to them, they always come through for me!!

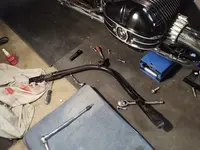
Now ... this needs to go there
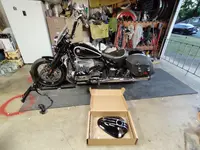
Chest Plate 02.webp

So first I looked around and found some instructions ( from BMW ... can you believe it???)
Unfortunately I can't seem to attach the .pdf here ... so here is a link to it INSTALLATION INSTRUCTION LINK you have to
Look under R-Series Heritage and then find your model and the part you want to install ... you figure it out ;)

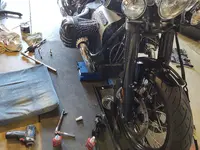
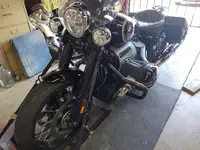
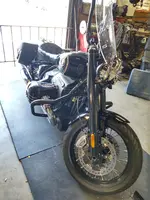
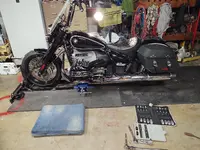
So in the wheel chock Uschi goes and a jack under the engine ... but just enough so it firmly touches
Chest Plate 03.webp

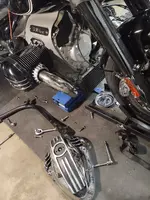
First I took off the crash bars and the foot peg assembly
I took a shortcut and didn't completely remove the linkage ... just held them up
with a bungee cord.
Chest Plate 04.webp

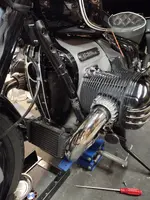
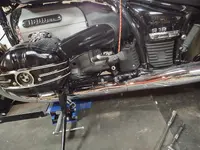
And the oil cooler cover needs to go too.
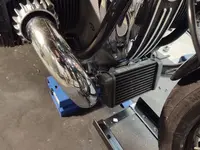
Chest Plate 05.webp

... and the horn ... then I went about splitting the frame.
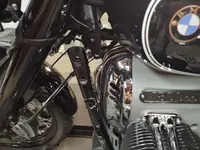
Chest Plate 06.webp

Chest Plate 07.webp

Easy piece ...and the old chest plate off ... watch it .. there is 1 bolt under the batch!
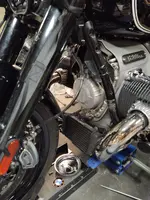
Chest Plate 08.webp

Chest Plate 09.webp

... to be continued
 
... continued

Test fit the new one

Chest Plate 10.jpg


Fits!!! ... I always put in all screws just finger tight and then remove one ... add Locktite and then torque it down
All done with the new pretty part !


Chest Plate 11.jpg

The I put the 2 frame pieces on ... BMW suggests you buy new bolts so you can have more of that F$%$#ing threadlocker they use!
No flippen way, I ran the old bolts on a wire wheel and removed all that $hit of theirs and used good old blue Locktite!!!
I checked all the threads of the bolts against a nut and made sure they were clean and good then ran them in and out
every hole to make double sure. installed the parts as I did with everything .. tighten all finger tight and then
remove each one, add Locktite (blue) and torque them down ... that is where the instructions came in handy .. there is torque values!!


Chest Plate 13A.webp

So everything in reverse and the crash bars back on ... WoooHooo I like it!!!

Chest Plate 14.webp

Chest Plate 15.webp


Done and done ... If somebody has use for one of these (not the whole chest plate ... just the add on pretty) send me a personal message I am sure we can figure something out.


Chest Plate 12.webp
 
Last edited:
You are a man with some savvy. Splitting the frame like that is something I have not done. Would require a stable set up.
 
You are a man with some savvy. Splitting the frame like that is something I have not done. Would require a stable set up.
Not really, it's actually easier than you may think 😉 the engine has a top mount as well, which makes things quite easy.
 
Any idea if this can be done with the bike on the kick stand?
It probably can be done ... but I would not recommend it ... although the engine is supported on the top, you will have to 'split' the frame and then everything would be leaning to the side when you put it back together ... nahhh bad idea IMO ... but a wheel chock is cheap and can also come in handy down the road (tire changes) ... you don't necessarily have bolt it to the floor and then just move it out of the way when you are done.
 
l utilised a wheel chock and a basic scissor lift - thanks to Ulrich’s pictures, job was straight forward. BMW loctite is a PITA.
Agreed on that BMW Threadlocker ... PITA for sure ... and even hard to get rid off with a wirewheel!!!
 
“But Ulrich, I don’t want to do it that way”!

“Listen to me young rider, for I am all wise in matters of the R18”….
IMG_1801.jpeg
 
So I did the install today, few points from my experience. You definitely do need a wheel chock or a way to keep the bike up outside of the kickstand as you loosen the frame where it connects for the install. I kept the middle largest bolt on the frame, just loosened it--still allowed me to move the frame away from the cover enough without removing it fully. I also used the trick of just the tie downs to hold up with linkage without removing all the pieces like the BMW instructions say. You definitely need a breaker wrench or something large to get the bolts loose, that BMW locker is ridiculous--my dog was checking on me due to all the grunting I was making, ha!

I have the Transcontinental so I had to also remove the steering dampener (to be able to remove the engine guards) and the knee fairings--just a little extra time, not difficult. The OP mentioned it but it's very important to hand tighten all the bolts on the frame support before tightening anything down, I got a little ahead of myself then realized I had to loosen everything up to align all the holes--oops. I thought it was a little crazy that I had to nearly use all my Torx bits as almost everything was a different size, come on BMW engineers! Be very careful to ensure you have the correct bit size, I almost stripped one bolt thinking I had the right size but it was one too small--my heart sank when it rotated and before I realized I needed to go up a size.

Overall, I'm happy I did the project, but I understand those who choose to have the dealer install the cover, it's not easy and you need to have the right tools and a decent amount of strength to get it done. I am happy to know my bike better and it was actually nice to polish some of the chrome and clean parts as I did this. Big thanks to Ulrich the OP, this guide was VERY helpful!
 
I have always used heat before attempting to loosen BMW bolts. Am guessing you did too?
... was thinking about that ... but IMO too many painted parts around that to use a torch ... and I don't think a heat gun would be that effective with that much metal around the bolt ...


So I did the install today, few points from my experience. You definitely do need a wheel chock or a way to keep the bike up outside of the kickstand as you loosen the frame where it connects for the install. I kept the middle largest bolt on the frame, just loosened it--still allowed me to move the frame away from the cover enough without removing it fully. I also used the trick of just the tie downs to hold up with linkage without removing all the pieces like the BMW instructions say. You definitely need a breaker wrench or something large to get the bolts loose, that BMW locker is ridiculous--my dog was checking on me due to all the grunting I was making, ha!

I have the Transcontinental so I had to also remove the steering dampener (to be able to remove the engine guards) and the knee fairings--just a little extra time, not difficult. The OP mentioned it but it's very important to hand tighten all the bolts on the frame support before tightening anything down, I got a little ahead of myself then realized I had to loosen everything up to align all the holes--oops. I thought it was a little crazy that I had to nearly use all my Torx bits as almost everything was a different size, come on BMW engineers! Be very careful to ensure you have the correct bit size, I almost stripped one bolt thinking I had the right size but it was one too small--my heart sank when it rotated and before I realized I needed to go up a size.

Overall, I'm happy I did the project, but I understand those who choose to have the dealer install the cover, it's not easy and you need to have the right tools and a decent amount of strength to get it done. I am happy to know my bike better and it was actually nice to polish some of the chrome and clean parts as I did this. Big thanks to Ulrich the OP, this guide was VERY helpful!
Thanks!
 
Back
Top