• Welcome to the BMW R18 Forums. Member registration disables ads and allows you to post and share. Register Here.

R18 Classic saddle bag mounting mod

  • <i class="fa--xf fal fa-check "><svg xmlns="http://www.w3.org/2000/svg" role="img" aria-hidden="true" ><use href="/data/local/icons/light.svg?v=1789222567#check"></use></svg></i> Discussion starter Discussion starter sjeuf12
  • Start date Start date

sjeuf12

Active member
Site Supporter
Joined
Jun 21, 2021
Messages
160
Location
Maastricht, The Netherlands
Visit site
Bike
R26, R27, R45, R18 classic
Hi there from Holland,
have been driving the R18 Classic for over a month now, with great pleasure.
However, whoever drives also has to clean .... not that I mind or often do that, but,
I do not like the mounting method of the original saddlebags for the R18 Classic.
They are each attached to the frame with 2 massive M8 Torx bolts and these bolts also keep the rear mudguard in place.
If it is time to clean the bike, the bag torx bolts must be unscrewed and after the washing session, everything must be mounted again.
Not only cumbersome, but also with a high risk of damage to the paintwork of the mudguard.

Therefore my following, simple modification:
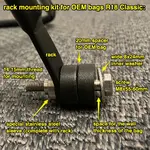
take 4 pieces of stainless steel M8 threaded rod of about 70 to 75 mm long. I took 75 mm to be ready for mounting a luggage rack on those same bolts.
Reuse the original plastic and stainless steel rings for the mudguard and add (in order of assembly) an ordinary stainless steel M8 nut, an 8mm washer, then the bag, then another 8mm washer and a spring washer and finally a stainless steel M8 wing nut. ...
Mount this with especially a lick of graphite grease on the screw thread which goes into the frame and use two counter-tightened nuts to secure it. Make sure that the threaded rod is screwed into the frame at least 25mm.

Removing and replacing the bags is now a piece of cake of 1 to 2 cents, without tools and virtually no chance of damage to the paintwork.

See the attached photos....
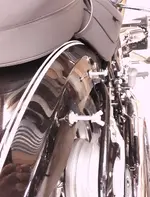
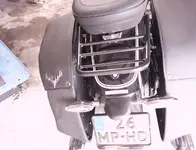
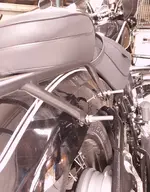
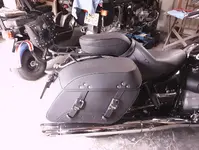
P1 - original configuration.
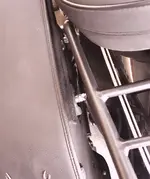
P2 - original Torx M8 bolt (2 pieces per bag)
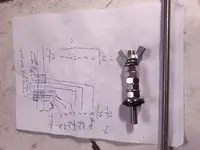
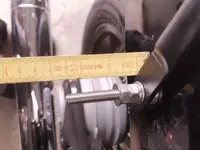
P3 - my solution with "sketch" and measurements... the 4 nuts between the inner washers are an indication of bolt through the bags... use 2 of those nuts (tightened counterclockwise) to screw the threaded rod into the frame and tighten the left (lower) nut. After mounting remove these 2 nuts...
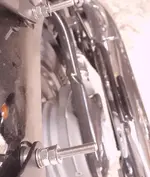
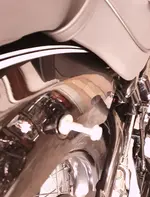
P4 - a threaded end solution and the original bolt
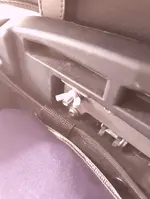
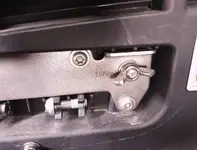
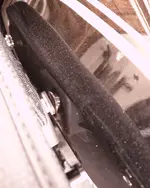
P5 - what you see in the bag .... so those wings fit exactly ...

nb... the bag is now a little further (M8 nut thickness) from the mudguard; definitely not a big deal....

have fun, Ser
 

Attachments

  • P1.webp
    P1.webp
    216.9 KB · Views: 68
  • P2.webp
    P2.webp
    232.7 KB · Views: 71
  • P3.webp
    P3.webp
    317.2 KB · Views: 78
  • P4.webp
    P4.webp
    286.8 KB · Views: 76
  • P5.webp
    P5.webp
    376 KB · Views: 71
Hi there from Holland,
have been driving the R18 Classic for over a month now, with great pleasure.
However, whoever drives also has to clean .... not that I mind or often do that, but,
I do not like the mounting method of the original saddlebags for the R18 Classic.
They are each attached to the frame with 2 massive M8 Torx bolts and these bolts also keep the rear mudguard in place.
If it is time to clean the bike, the bag torx bolts must be unscrewed and after the washing session, everything must be mounted again.
Not only cumbersome, but also with a high risk of damage to the paintwork of the mudguard.

Therefore my following, simple modification:
take 4 pieces of stainless steel M8 threaded rod of about 70 to 75 mm long. I took 75 mm to be ready for mounting a luggage rack on those same bolts.
Reuse the original plastic and stainless steel rings for the mudguard and add (in order of assembly) an ordinary stainless steel M8 nut, an 8mm washer, then the bag, then another 8mm washer and a spring washer and finally a stainless steel M8 wing nut. ...
Mount this with especially a lick of graphite grease on the screw thread which goes into the frame and use two counter-tightened nuts to secure it. Make sure that the threaded rod is screwed into the frame at least 25mm.

Removing and replacing the bags is now a piece of cake of 1 to 2 cents, without tools and virtually no chance of damage to the paintwork.

See the attached photos....
P1 - original configuration.
P2 - original Torx M8 bolt (2 pieces per bag)
P3 - my solution with "sketch" and measurements... the 4 nuts between the inner washers are an indication of bolt through the bags... use 2 of those nuts (tightened counterclockwise) to screw the threaded rod into the frame and tighten the left (lower) nut. After mounting remove these 2 nuts...
P4 - a threaded end solution and the original bolt
P5 - what you see in the bag .... so those wings fit exactly ...

nb... the bag is now a little further (M8 nut thickness) from the mudguard; definitely not a big deal....

have fun, Ser
A great tip and one I will try when I get home.
 
Good afternoon,
Today the rear-end of the R18 Classic was decorated with a luggage carrier from Holan from Poland.
holan.pl/en/r-18/4641-r18-classic-rack-version-rider-passenger-.html

This of course in combination with my mod for quick release of the saddlebags.

Points of attention were:
- applying the thicker stainless steel discs, as supplied by Holan, using the original plastic protection discs, between the luggage rack and the mudguard.
- tailoring the luggage rack...original this doesn't fit too well; the legs are a bit too close together... the distance between the fixing eyes should be 16 cm... easy to do yourself in a sturdy vice, by hand and carefully, bend a few mm.
- use an extra stainless steel nut to increase the distance between bag and bracket. So now 2 nuts and a few washers.
This is because of the possible grinding of the saddle bag lid on the paintwork of the rack when opening the bag.

The originally estimated length of the stainless steel threaded rod (75mm) turned out to be sufficient. But 80mm might be better.

See the attached pictures again:
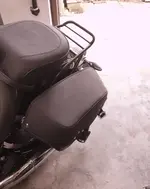
P10,11 the end result
P12 the stainless steel threaded ends, with the thicker stainless steel disc from Holan between rack and mudguard
P13 the stainless steel threaded ends with extra rings and discs
P14 ditto, but now with a size indication
P15 distance between bag and luggage rack for protection of paintwork when opening bag
P16 this is what it looks like in the bag

again, have fun playing
gr ser
 

Attachments

  • p17.webp
    p17.webp
    429.8 KB · Views: 45
  • p16.webp
    p16.webp
    298.8 KB · Views: 42
  • p15.webp
    p15.webp
    175.2 KB · Views: 42
  • p14.webp
    p14.webp
    215.6 KB · Views: 43
  • p13.webp
    p13.webp
    122.7 KB · Views: 44
  • p12.webp
    p12.webp
    334.1 KB · Views: 47
  • p11.webp
    p11.webp
    384.4 KB · Views: 51
  • p10.webp
    p10.webp
    220.4 KB · Views: 49
as standard, we provide a stainless steel distance of 10mm for the rack. we can additionally add additional spacer sleeves and longer bolts. Just write what they should be for Classic. We only have FE in the companys ;)
 
as standard, we provide a stainless steel distance of 10mm for the rack. we can additionally add additional spacer sleeves and longer bolts. Just write what they should be for Classic. We only have FE in the companys ;)
FE??... a 17-20mm spacer between rack and saddle bag, combined with 20mm longer bolts would be nice, but in my case I would need a stainless steel nut type solution, since it locks the stainless steel rod. In my construction I would not be needing those longer bolts... The spacer solution should look nicer then my washer and nut solution...
 
Sjeuf,
is this what the mounting kit for bags should look like, would you make some adjustments?
6EB86FFF-3BB2-4F12-925C-2A86C7629E91_1_105_c.jpg
 
Last edited:
Sjeuf,
is this what the mounting kit for bags should look like, would you make some adjustments?
View attachment 3034
nope, in my version, the bag is not attached with a screw, but all is centred and attached with a stainless steel threaded end (75-80mm) and the bags are attached with winged nuts. Thus having not only a quick release, but also avoid damage during mounting and unmounting the bags... see my original post on this, in this thread, of oktober 2

nb. your M8 screw is to short... you will need at least 75 mm... the wall thicknes for the bag is 25+ mm... there is a stainless steel spacer in the bag
 
Last edited:
thanks for specifying the wall thickness of the bag and the length of the screw. Question: What can be seen on the motorcycle after disassembling the bag? ;)
 
thanks for specifying the wall thickness of the bag and the length of the screw. Question: What can be seen on the motorcycle after disassembling the bag? ;)
Hi, after taking of the bag, you see the threaded ends
See pictures P4, P12 and P14 in this thread....One shouldn't be driving with that....
When taking of the bags of the bike, on a more permanent basis, re-insert the standard bolts, or shorter ones, that hold the mudguard in place.
 
Hi, after taking of the bag, you see the threaded ends
See pictures P4, P12 and P14 in this thread....One shouldn't be driving with that....
When taking of the bags of the bike, on a more permanent basis, re-insert the standard bolts, or shorter ones, that hold the mudguard in place.
these shorter bolts (M8 thorx) are stored in the bag; see picture P17, the M8 bolts in horizontal position.
 
Back
Top