• Welcome to the BMW R18 Forums. Member registration disables ads and allows you to post and share. Register Here.

What did you do to your R18 today?

  • <i class="fa--xf fal fa-check "><svg xmlns="http://www.w3.org/2000/svg" role="img" aria-hidden="true" ><use href="/data/local/icons/light.svg?v=1789222567#check"></use></svg></i> Discussion starter Discussion starter TodkaVonic
  • Start date Start date
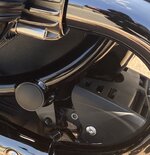
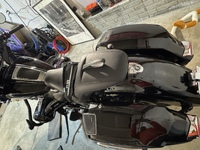
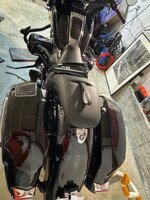
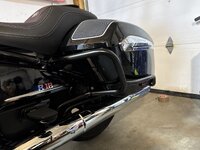
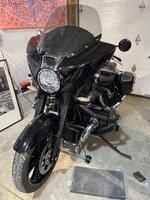
Saddlebag crashbars went on last night.. pretty easy install.
Looking awesome. I think those are the same crash bars my wife got me for my birthday. They didn't come with instructions. Looking at yours will be a good guide. Do you have a link to yours? My bike was picked up on Friday for paint correction, ceramic coating and PPF.
 
Looking awesome. I think those are the same crash bars my wife got me for my birthday. They didn't come with instructions. Looking at yours will be a good guide. Do you have a link to yours? My bike was picked up on Friday for paint correction, ceramic coating and PPF.
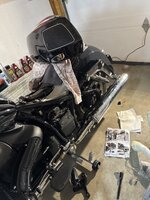
Uhmmm, I used the instructions from an un-named source :p. They showed me enough to be able to figure it out. Couple of items: 1. Not necessary to remove the bags. Remove the 2 bolts holding the bags to their brackets. if you don't have a second set of hands to assist, place a towel where the seat would be. Flip the bag over and lay it on its side on top of the towel; 2. use the stock bolts. Mine had no hardware included. They are the TCMT from Amazon: https://www.amazon.com/TCMT-Saddleb...2-2024/dp/B0CR2Z1G9H/ref=ast_sto_dp_puis?th=1 3. Make yourself some spacers (a couple of washers) to use between the bike's frame and the crashbar mounting points under the seat. My bars came with 2 spacers. I used those 2 on the front bottom mounting points (where the passenger footpegs mount. ; 4. take your time. It should take you about 20-25 minutes for the first side and about 10 for the second (once you do one side you'll see how easy the other will be.
Here's the sequence I followed:
1. Remove the seat
2. Empty your saddlebags
3. remove the exhaust heat shield thats right under the passenger peg.
4. remove the passenger pegs
5. remove the 2 bolts holding the saddlebag on to their brackets.
6. either flip the bag over and lay on the towel you placed instead of the seat (note, you may have to undo a couple of zip ties to get the wiring to reach), or have someone hold the bag up while you install the 2 back bolts at the tailpipe mounting point.
7. remove the 2 rear bolts holding the tailpipes to their mounting points
8. remove the large torx bolt that is right under the seat (use the crashbars as a reference to which bolts I'm referring to).
9 Mount the crashbar using the stock bolts making sure to put some spacers on the top mounting point (spacer, bracket, bolt) in that order. The bottom mounting point uses the lower mounting point of the footpeg you removed. The order of install for the bottom front mounting point is (crashbar, lower mounting point of footpeg, stock bolt). for the top mounting point of the footpeg use a spacer again.
10. Install the 2 rear mounting bolts (where the tailpipe mounts)
11. Flip your saddlbag back over and reinstall bolts that secure the bag to the brackets.
12. Reinstall Heat Shield.
13. Repeat for other side.
note: - install everything loose until all 3 mounting points are in place and bolts have been hand started.
- Use threadlock on all bolts

Sorry, but I didn't take pictures, but if you can't figure it out, PM me, we'll figure it out.
Good luck!
 
Last edited:
Uhmmm, I used the instructions from an un-named source :p. They showed me enough to be able to figure it out. Couple of items: 1. Not necessary to remove the bags. Remove the 2 bolts holding the bags to their brackets. if you don't have a second set of hands to assist, place a towel where the seat would be. Flip the bag over and lay it on its side on top of the towel; 2. use the stock bolts. Mine had no hardware included. They are the TCMT from Amazon https://www.amazon.com/dp/B0CR2Z1G9H?ref=ppx_yo2ov_dt_b_fed_asin_title&th=1 ; 3. Make yourself some spacers (a couple of washers) to use between the bike's frame and the crashbar mounting points under the seat. My bars came with 2 spacers. I used those 2 on the front bottom mounting points (where the passenger footpegs mount. ; 4. take your time. It should take you about 20-25 minutes for the first side and about 10 for the second (once you do one side you'll see how easy the other will be.
Here's the sequence I followed:
1. Remove the seat
2. Empty your saddlebags
3. remove the exhaust heat shield thats right under the passenger peg.
4. remove the passenger pegs
5. remove the 2 bolts holding the saddlebag on to their brackets.
6. either flip the bag over and lay on the towel you placed instead of the seat (note, you may have to undo a couple of zip ties to get the wiring to reach), or have someone hold the bag up while you install the 2 back bolts at the tailpipe mounting point.
7. remove the 2 rear bolts holding the tailpipes to their mounting points
8. remove the large torx bolt that is right under the seat (use the crashbars as a reference to which bolts I'm referring to).
9 Mount the crashbar using the stock bolts making sure to put some spacers on the top mounting point (spacer, bracket, bolt) in that order. The bottom mounting point uses the lower mounting point of the footpeg you removed. The order of install for the bottom front mounting point is (crashbar, lower mounting point of footpeg, stock bolt). for the top mounting point of the footpeg use a spacer again.
10. Install the 2 rear mounting bolts (where the tailpipe mounts)
11. Flip your saddlbag back over and reinstall bolts that secure the bag to the brackets.
12. Reinstall Heat Shield.
13. Repeat for other side.
note: - install everything loose until all 3 mounting points are in place and bolts have been hand started.
- Use threadlock on all bolts

Sorry, but I didn't take pictures, but if you can't figure it out, PM me, we'll figure it out.
Good luck!
Thanks so much Jorge. Very helpful. My bars came with 2 long bolts and 4 short ones as well as 6 washers/spacers. Two being thicker that the other 4.
here's a link https://www.amazon.ca/gp/product/B0CL4N4RY8/ref=ox_sc_act_image_2?smid=A12IHVJUBP37K4&psc=1
I suspect your installation instructions is spot on.
Thanks again, I'll PM you if I run into an issue
 
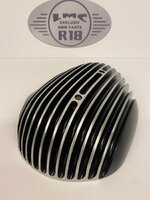
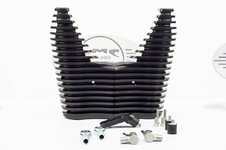
This is more of a ‘should I do this to my R18 today’….
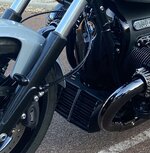
I am considering getting the metal oil radiator guard and when I compare them to the plastic OEM guard, I’ve noticed that they don’t appear to have as much ‘breathing’ space around them and they are not vented at the top like the plastic one.
Should this be a concern?IMG_5249.jpegIMG_5561.jpeg
 
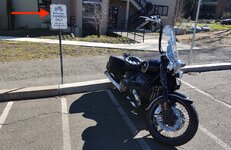
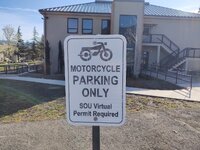
LOL .. the small University I am working for is so generous to their employees that we even have to pay for parking ... or park 2 blocks down the road ... (insert sarcastic grin here ) !!!
I worked at large company for 26 years to reach seniority for free parking in the building parking decks. 8 months afterwards, they started charging for parking "to be fair to all employees"...
 
This is more of a ‘should I do this to my R18 today’….
I am considering getting the metal oil radiator guard and when I compare them to the plastic OEM guard, I’ve noticed that they don’t appear to have as much ‘breathing’ space around them and they are not vented at the top like the plastic one.
Should this be a concern?View attachment 20529View attachment 20530
I wouldn't waste any money swapping out the OEM plastic housing for any of the aftermarket solutions; it's still going to look unsightly, and not provide any performance improvements.

With that sat said, if my oil cooler was to be subjected to a catastrophic shot and was badly damaged (leaking...); i would then upgrade to the LMC Oil Cooler, which I think is the best looking and functional - but also very expensive...

Screenshot_20260101-073903.png
 
Last edited:
@HUNTS
Nice fit, where you got this? Amazon? Hardware store?
What should I look for, no idea of size or name.

View attachment 20532
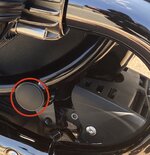
Found it amongst ‘my cupboard of unusual stuff’ in my garage. It’s from Bunnings Hardware store and is for furniture legs (usually kitchen chairs). It was pure fluke that it fit, but looks SO much better.
 
I haven't ridden the bike yet, so can't comment on them. From memory they were $20 each plus $20 postage..... but in $us..... so about $100 real money for 2 to my door.... cost was why I didn't pull the trigger last time... cashed up and boored at the moment....

Just lever off old one and push on new.... just need to be brave.

[/URL][/URL]

I find the original a bit "something lacking".... so finally just scratched the itch.... who knows if it was just a phanton itch. A minute ago I just bought an open face Bell helmet for no real good reason as well.... so best not look to me for meaningfull purchases/ideas.
Aliexpress is now selling these larger turn signal switch buttons - I just bought one - about 13.50 USD - there are a lot of them listed, some much cheaper than others - watch out for the shipping charges - the one I ordered had shipping included but others had as much as 40.00 shipping.
https://www.aliexpress.us/item/3256...st_main.5.34ca1802EEM7zR&gatewayAdapt=glo2usa
 
A link to stuff if you win powerball.... https://www.lmc-bikes.de/shop/BMW-R18-Parts-c119446756

$3,000 aussie for a pair of these:

View attachment 20533

And again for this:

View attachment 20534

But you do get to learn some useful German.....
I agree... It's f....g pricey..$$. But super high quality and super painful if you don't read or write German... Believe me...

All that said, if you just ordered the oil cooler, that should be a pretty straightforward purchase; if considering a complete Bobber project, that could be painful...
 
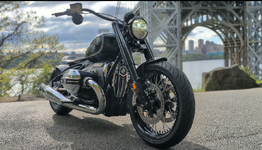
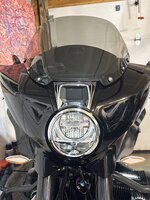
Had it paint corrected, Hela-Proof Ceramic coat, PPF, crash bar for the bags, taller windshield, winglets and drilled out the baffles in the exhausts. It was PITA getting the disc out that I just removed the pipes to get them out. Busy Saturday afternoon. Very happy with everything. Thanks to jorgebri60 for his insight.
 

Attachments

  • tempImagebqnkP3.png
    tempImagebqnkP3.png
    11.1 MB · Views: 19
  • IMG_3669.jpeg
    IMG_3669.jpeg
    2.2 MB · Views: 5
  • IMG_3658.jpeg
    IMG_3658.jpeg
    1.6 MB · Views: 5
  • IMG_3675.jpeg
    IMG_3675.jpeg
    2 MB · Views: 5
  • IMG_3681.jpeg
    IMG_3681.jpeg
    2.2 MB · Views: 5
  • IMG_3668.jpeg
    IMG_3668.jpeg
    2.8 MB · Views: 5
Back
Top