• Welcome to the BMW R18 Forums. Member registration disables ads and allows you to post and share. Register Here.

Drive Shaft removal

  • <i class="fa--xf fal fa-check "><svg xmlns="http://www.w3.org/2000/svg" role="img" aria-hidden="true" ><use href="/data/local/icons/light.svg?v=1789222567#check"></use></svg></i> Discussion starter Discussion starter Saintex
  • Start date Start date

Saintex

Member
Site Supporter
Joined
Mar 11, 2023
Messages
56
Location
Montreal
Visit site
Bike
R18 f850gsa
Hello all

has anyone removed the drive shaft yet? I'm interested in knowing the tool required and torques and if either nut is a reverse thread.?

Why you ask?

1-to install a phat 240 rear tire/wheel
2-possibly painting it black chrome

Thanks
 
Hi, saw this post the other day. Pretty sure the lack of response says everything and no one has. Think you will be walking your own path on this one, if you go for it good luck anyway. Maybe approach one of the established bike builders that do these amazing BMW R18 customs or even just visit a BMW dealer and speak to one of the technicians, worth a try.
 
Agreed, apologies. I Thought maybe it was in the wrong forum.
I see, that shows my ignorance since I didn't even notice they were in different forums. I just read the latest posts that I find interesting, regardless of forum. Don't most of us? Anyway, didn't mean to lecture.

And welcome to the forum :)
 
To each his own, I understand the wide back wheel thing, But, I wouldn't want to remove that beautiful nickel plating that the driveshaft comes with from the factory.
 
So
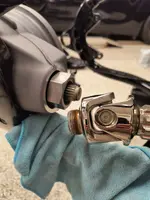
the drive shaft and the right angle drive MUST be removed to install a 240 tire/wheel. the central cover on the right angle drive should also be removed to give some more room . it is not difficult but it does require either a special tool from BMW FOR THE big nut on the shaft or a similar tool of the "crow's foot " type


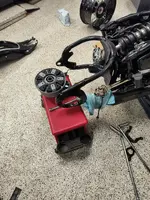
when installing the wheel the right angle drive is held on the wheel while it is put in place. then the right angle drive can be held in place with 2 or 3 bolts while the quick release axle is put in place. then the central cover is re installed . Caution the central cover is finely machined and it's Surface should be protected during installation.
 
So
the drive shaft and the right angle drive MUST be removed to install a 240 tire/wheel. the central cover on the right angle drive should also be removed to give some more room . it is not difficult but it does require either a special tool from BMW FOR THE big nut on the shaft or a similar tool of the "crow's foot " type


when installing the wheel the right angle drive is held on the wheel while it is put in place. then the right angle drive can be held in place with 2 or 3 bolts while the quick release axle is put in place. then the central cover is re installed . Caution the central cover is finely machined and it's Surface should be protected during installation.
You didn't happen to take any pictures during your DIY, did you?

Mike
 
It's really quite simple. Awkward holding the right angle drive against the wheel while you (jack) it into place because both Are quite heavy. Probly easier with a helper (to hold your beer)
 
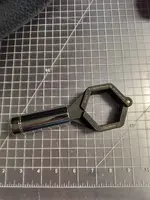
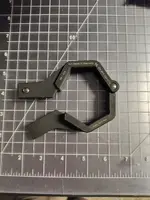
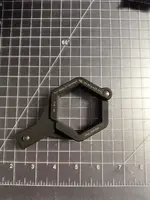
One of the tools (basically the only one required if the rear brake is operational.

Note it's not a 1/2 drive gtp a weirdo BMW proprietary -0.7/.55 in or 18.3/9.1 mm

Or just slide a 13/16 or 21mm deep socket over it.


Stahlwille sells a crow's foot that might also fit (46mm required theirs is 47....)
 

Attachments

  • IMG_20230728_125006739_HDR.webp
    IMG_20230728_125006739_HDR.webp
    1.1 MB · Views: 19
  • IMG_20230728_124623294_HDR.webp
    IMG_20230728_124623294_HDR.webp
    954 KB · Views: 19
  • IMG_20230728_124617403.webp
    IMG_20230728_124617403.webp
    1.4 MB · Views: 19
Thanks for the pics Saintex!

Question: The threads of the universal joint going into the final drive, are they normal or reverse-threaded?

And lastly, for everyone: One thing to think about with nickel-plated metal is: Unlike chrome, nickel-plating is a super-cheap process that can be done at home. Why do I say that? Years from now when rust inevitably comes knocking on our bikes' doors, BMW has already nickel-plated ONE piece of the bike for us...maybe handlebars or exhaust pipes or other pieces might be worthy of a true vintage restoration technique? It's something I'm already thinking about now.

Mike
 
Thanks for the pics Saintex!

Question: The threads of the universal joint going into the final drive, are they normal or reverse-threaded?

And lastly, for everyone: One thing to think about with nickel-plated metal is: Unlike chrome, nickel-plating is a super-cheap process that can be done at home. Why do I say that? Years from now when rust inevitably comes knocking on our bikes' doors, BMW has already nickel-plated ONE piece of the bike for us...maybe handlebars or exhaust pipes or other pieces might be worthy of a true vintage restoration technique? It's something I'm already thinking about now.

Mike
Nickel plated - is that why it's a slightly different color than our chrome bits?
 
Nickel plated - is that why it's a slightly different color than our chrome bits?
Yup. However, it can be polished to a chrome-like finish. It just takes some elbow grease to get to that level of shine.

Mike
 
Back
Top