Intro:
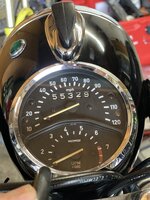
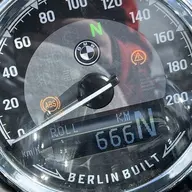
I started this journey asking questions on the forum back in 2023. I am finally proud this project is finished and I wanted to share it with you all incase you want to do the same thing. I'm one of those individuals who use their tachometer and was bummed out when this wasn't a factory option on the R18. I quickly got annoyed having to flip through the menus for the time, tach, and distance driven as I use those features consistently while I'm on my rides. Looking to the aftermarket options, I disliked what's available as it didn't look factory. This should have been available as a factory option.
Additionally, I've also confirmed the fuel gauge also does work for anyone wanting to add to their build.
BMW Part numbers are at the bottom of the post. The history thread is linked here for anyone wondering.
Wiring
*Pinout of 4 Wires from ECU Harness to Speedometer:
Quick reference below:
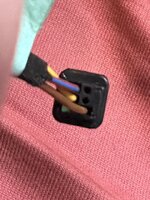
**Back of Speedo connector**
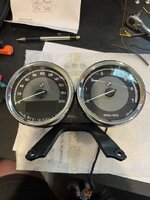
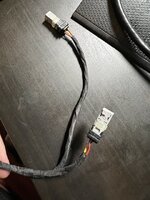
The catch here is you will need a donor cable from the K35 Bagger/ Transcontinental as BMW doesn't sell these cables/connectors separately to make your own harness. The work is simple as it just requires splicing the matching wires together from the donor harness to the main cable on the bike that powers the Speedo (or any other gauges you want to add in series). Up to you on how to connect them (solder direct/ run a connector inline), however, I chose to use a Deutsch 4 pin connector (DTM04-4P & DTM06-4S) so I can quick disconnect them or modify if needed in the future.
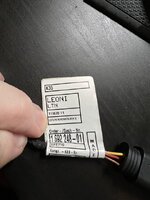
**Picture of the donor wiring harness I used to make my new harness**
Mounting:
I simply welded the factory R18 bracket to the the R9T factory bracket which I ordered from my dealer. I outsourced the powder coating to a local shop.
Before:
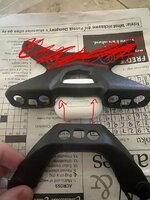
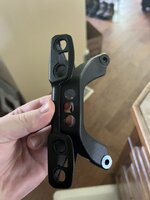
After (Cutting, Welding, Powder Coating)
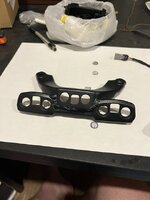
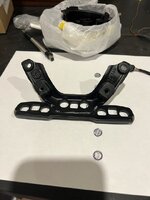
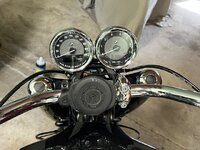
After everything was fabricated, it all bolted together perfectly.
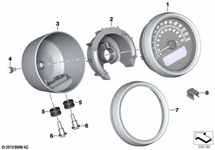
BMW Motorrad Parts Used:
62119446548 - K35 Bagger Tachometer
77538389483 - NineT Gauge holder mount
62119480185 - Cluster housing (Black) (#3)
62119467601 - Inner Plastic Spacer (#2)
62111539597 - Housing Trim Ring (Chrome) (#7)
64226916475 - Countersunk Head Screw (you will need 1 of these) (#4)
62118356970 - Rubber Grommet (you will need 2 of these) (#5)
46638521655 - Body screw with collar. M5X20 (#6)
11107811 - K35 Wiring Harness (unsure if BMW sells directly)
I started this journey asking questions on the forum back in 2023. I am finally proud this project is finished and I wanted to share it with you all incase you want to do the same thing. I'm one of those individuals who use their tachometer and was bummed out when this wasn't a factory option on the R18. I quickly got annoyed having to flip through the menus for the time, tach, and distance driven as I use those features consistently while I'm on my rides. Looking to the aftermarket options, I disliked what's available as it didn't look factory. This should have been available as a factory option.
Additionally, I've also confirmed the fuel gauge also does work for anyone wanting to add to their build.
BMW Part numbers are at the bottom of the post. The history thread is linked here for anyone wondering.
Wiring
*Pinout of 4 Wires from ECU Harness to Speedometer:
- Yellow = ACC signal for power on/ backlight
- Brown = Ground
- Red/Green = 12V + Linbus data for engine information
- Grey/Purple = likely related to accessory communication.
Quick reference below:
Yellow -->Yellow
Brown --> Brown
Red/Green --> Red /Blue
**Back of Speedo connector**
The catch here is you will need a donor cable from the K35 Bagger/ Transcontinental as BMW doesn't sell these cables/connectors separately to make your own harness. The work is simple as it just requires splicing the matching wires together from the donor harness to the main cable on the bike that powers the Speedo (or any other gauges you want to add in series). Up to you on how to connect them (solder direct/ run a connector inline), however, I chose to use a Deutsch 4 pin connector (DTM04-4P & DTM06-4S) so I can quick disconnect them or modify if needed in the future.
**Picture of the donor wiring harness I used to make my new harness**
Mounting:
I simply welded the factory R18 bracket to the the R9T factory bracket which I ordered from my dealer. I outsourced the powder coating to a local shop.
Before:
After (Cutting, Welding, Powder Coating)
After everything was fabricated, it all bolted together perfectly.
BMW Motorrad Parts Used:
62119446548 - K35 Bagger Tachometer
77538389483 - NineT Gauge holder mount
62119480185 - Cluster housing (Black) (#3)
62119467601 - Inner Plastic Spacer (#2)
62111539597 - Housing Trim Ring (Chrome) (#7)
64226916475 - Countersunk Head Screw (you will need 1 of these) (#4)
62118356970 - Rubber Grommet (you will need 2 of these) (#5)
46638521655 - Body screw with collar. M5X20 (#6)
11107811 - K35 Wiring Harness (unsure if BMW sells directly)
Last edited: