• Welcome to the BMW R18 Forums. Member registration disables ads and allows you to post and share. Register Here.

Tail Light Modifications

  • <i class="fa--xf fal fa-check "><svg xmlns="http://www.w3.org/2000/svg" role="img" aria-hidden="true" ><use href="/data/local/icons/light.svg?v=1789222567#check"></use></svg></i> Discussion starter Discussion starter Fuzz
  • Start date Start date

Fuzz

New member
Joined
Oct 25, 2025
Messages
2
Location
Cazenovia, NY
Visit site
Bike
BMW R18, Indian Springfield, BMW R1200 GS
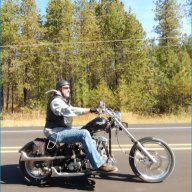
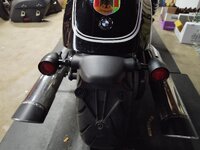
I'm converting my 2021 First Edition Classic to a Bobber and am going to use Kellermann rear signals. Does anyone that has done a similar modification know if this will mess with the Canbus, and if so what is the remedy? I've reached out to Kelermann for guidance but have not received a response. Thanks in advance!
Tim
 
Yes, I used Kellerman 'Bullet 1000's' and the resistance must be close enough that the Canbus doesn't even notice.
 
Oh wait ... I used the Kellerman in the front ... and some off-brand ones in the back
because Kellerman didn't have the style I wanted.

Rear Blinker10.jpg
 
Not Kellermann, but I recently installed DENALI lighting on my bike and wanted to share my experience in case it helps.

I have a late ’25 R18B (Premium), and based on what I’ve seen in several threads here, there appear to be some wiring changes on this model. The CAN bus port referenced in older posts either does not exist on my bike or is not accessible in the same way. I was also unable to find any viable way to connect a CANsmart on my specific bike.

I worked with DENALI tech support, but they did not have prior experience with this particular model year/configuration, and we eventually ran out of options. As a result, I spent a couple of days metering every accessible connector under the seat and identifying which ones were triggered by brake, running, or turn signals.

I ultimately went with a direct-wired solution, which worked well for my setup. I installed DENALI B6 lights, which use three wires: ground, running light power, and brake/turn trigger.
On my bike, I was able to locate a true switched 12V source from a factory connector intended for adding a trunk. I used that for the running light power. All grounds (for these and other accessories) are centralized and run directly to the battery negative.

For the final trigger wire, I found two separate trigger wires—one for the left side and one for the right—located on different connectors. On my bike, these trigger wires sit at approximately 6V at rest and jump to 12V when either the brake is applied or a turn signal is activated. This worked reliably for my installation.

This approach worked on my late ’25 R18B Premium, and while I can’t say it will be identical on every bike, it may be helpful if you’re running into similar challenges installing the Kellermanns.


Hope this helps.
 
  • Like
Reactions: LBV
Any pictures of your installation..... I'm trying to visualize what you did ..? I'm guessing you replaced the existing taillights on each of the bags and or modified the license plate bracket?

The NAS R18 bikes only utilize two wires; ground (-) and the positive variable ( +6V & +12V) voltage to change the taillight brightness.
 
Any pictures of your installation..... I'm trying to visualize what you did ..? I'm guessing you replaced the existing taillights on each of the bags and or modified the license plate bracket?

The NAS R18 bikes only utilize two wires; ground (-) and the positive variable ( +6V & +12V) voltage to change the taillight brightness.
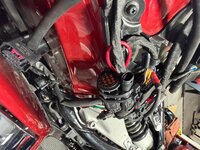
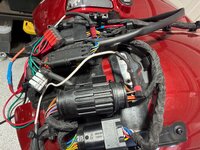
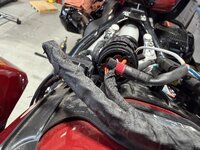
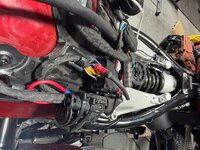
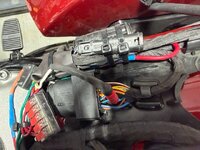
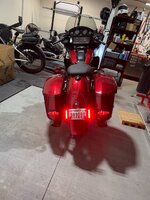
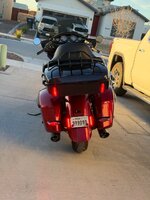
Absolutely, oh and yes, I realize that both turn signals and brakes run of the single wire to each. Since the Denali use 3 wires, I was able to run 12v switched for the running lights, and used the 6/12v wire to trigger the turnsignal/brakes. The 6v doesn't affect the the Denali lights so they ignore it. When you press on the brake/turn signal that bumps the voltage to 12v it operates the 3rd wire(turn/brake). This allowed me to leave the stock lights and add these B6 lights as extra lights on the license plate. Here's a video of them in action and a few of the pictures I took. Denali tech support kept my documentation and photos in case someone is trying to do the same and unable/not wanting to do the CANsmart. As far as mounting, The B6 Denali have several mounting options. I used the license plate mounts for these. I've had these on my last 4 bikes. https://denalielectronics.com/products/dnl-b6-10100?rq=gc_motorcycle~yr_2025~mk_bmw~md_r-18-b


[/URL]

The pictures are named what they are depicting
 

Attachments

  • 12v switched from trunk connector.jpeg
    12v switched from trunk connector.jpeg
    1.9 MB · Views: 27
  • Left Turn signal Connector.jpeg
    Left Turn signal Connector.jpeg
    2.2 MB · Views: 22
  • Left Turn signal wire.jpeg
    Left Turn signal wire.jpeg
    1.8 MB · Views: 21
  • right turn signal connector.jpeg
    right turn signal connector.jpeg
    1.8 MB · Views: 22
  • Right Turn signal wire Medium.jpeg
    Right Turn signal wire Medium.jpeg
    81.8 KB · Views: 25
  • IMG_1894 Large.jpeg
    IMG_1894 Large.jpeg
    262.4 KB · Views: 24
  • IMG_1932 Large.jpeg
    IMG_1932 Large.jpeg
    229.7 KB · Views: 8
Last edited:
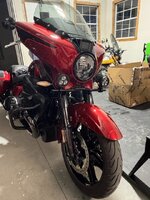
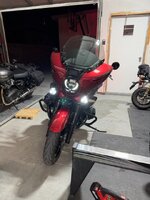
I also added the D3 Driving lights. Since I could not use CANsmart, these too are hard wired. Same 12v power source, same ground, I left the high intensity cable capped until I can figure out how to access the headlight connector so they're running at 50-60% intensity. If any of you know how to remove the headlight on a '25 B please let me know.. I tried for a bit and was afraid I was going to break the bezel. I couldn't even get passed that.
 

Attachments

  • IMG_1892 Medium.jpeg
    IMG_1892 Medium.jpeg
    79.3 KB · Views: 11
  • IMG_1895 Medium.jpeg
    IMG_1895 Medium.jpeg
    65.2 KB · Views: 11
Back
Top